
Set Up Environment for Deep Learning on Mac M1
Published:
This article introduce steps to set up the Python environment for deep learning on Mac M1. We will cover
Before we start, if you have already installed Anaconda or other conda environment, you may want to uninstall them first using anaconda-clean.
conda install anaconda-clean
anaconda-clean --yes
To remove the entire directory, try following.
rm -rf ~/anaconda3
rm -rf ~/.anaconda_backup
rm -rf ~/opt/anaconda3
rm -rf ~/miniforge3
Finally, we need to remove anaconda path in .bash_profile. open .bash_profile from terminal, delete the line export PATH="/Users/your_username/anaconda3/bin:$PATH". If you don’t have permission to write to it, use sudo chown your_username ~/.bash_profile to change the owner of the file, and try again.
Now we could start the main course.
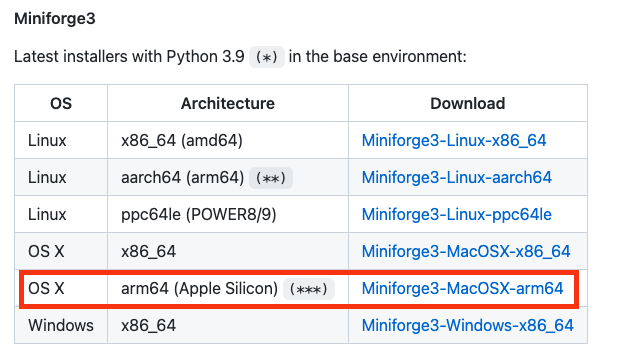
Install Miniforge 3
Download miniforge3 from here. Choose Miniforge3-MacOSX-arm64,and save to Downloads.
Run the command below to install. Follow the default option during installation.
chmod +x ~/Downloads/Miniforge3-MacOSX-arm64.sh
sh ~/Downloads/Miniforge3-MacOSX-arm64.sh
source ~/miniforge3/bin/activate
You could also use homebrew brew install miniforge.
After you have successfully install Miniforge 3, restart the terminal and move to the next step.
Install Tensorflow
Before installing Tensorflow, we need to create a conda environment for it.
conda create -n tensorflow python==3.9
conda activate tensorflow
Note that tensorflow after conda create -n is the name for this new environment, feel free to use any name you like. I realized at the end that I put Tensorflow and Transformers under one environment and named it “tensorflow”. You could always rename it using conda rename -n old_name -d new_name.
Now we can install tensorflow.
conda install -c apple tensorflow-deps
python -m pip install tensorflow-macos
python -m pip install tensorflow-metal
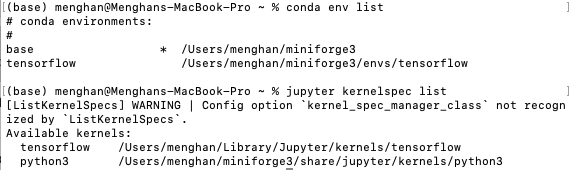
To check if the installation is successful, run conda env list, you will find two environments, base and tensorflow. You could also check available kernel by jupyter kernelspec list.
Next, let’s install some commonly-used packages. Note that the first two lines set conda-forge as the highest priority channel.
conda config --add channels conda-forge
conda config --set channel_priority strict
conda install jupyter jupyterlab pandas matplotlib seaborn nltk spacy beautifulsoup4 scikit-learn
Finally, open the jupyter lab to check your Tensorflow version and device. You can now try Tensorflow on your mac!
source ~/miniforge3/bin/activate
conda activate tensorflow
jupyter lab

Install Transformers
The final piece we need is Transformers. Before that, we should install PyTorch and Rust.
pip install -U --pre torch torchvision torchaudio --extra-index-url https://download.pytorch.org/whl/nightly/cpu
curl — proto ‘=https’ — tlsv1.2 -sSf https://sh.rustup.rs | sh
Now you can run pip install transformers to get the job done. Enjoy your journey!
Reference
- Anaconda, Uninstalling Anaconda Distribution
- Apple developer
- better data science, How To Install TensorFlow 2.7 on MacBook Pro M1 Pro With Ease
- James Briggs, Hugging Face and Sentence Transformers on M1 Macs
- Jeff Heaton @ Youtube, Mac M1 Monterey Installing Miniforge and Anaconda/Miniconda Side-by-Side